Disclaimer: This content is for educational purposes only, not medical advice. Always consult with a doctor before making significant changes to your diet, especially if you have pre-existing health conditions.
The Story & Intro
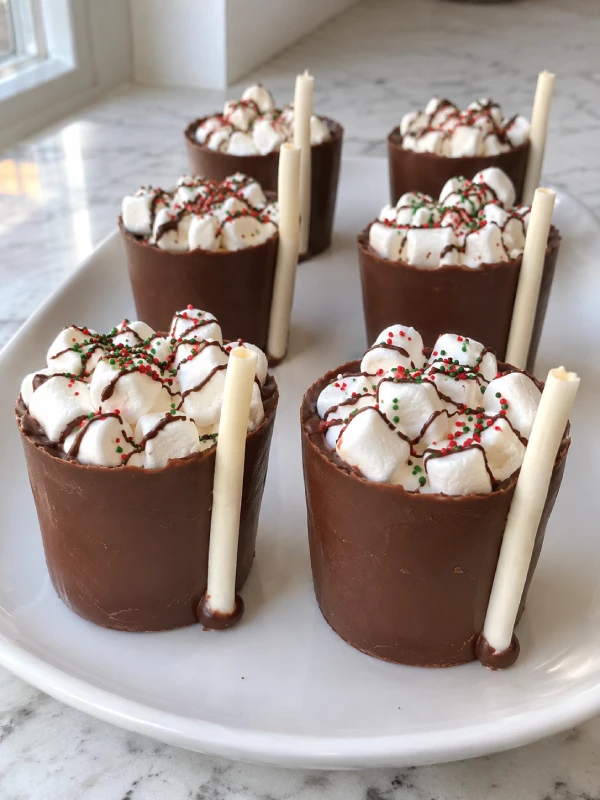
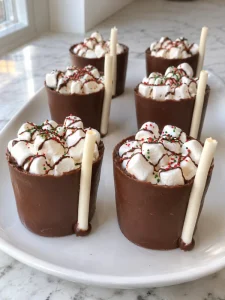
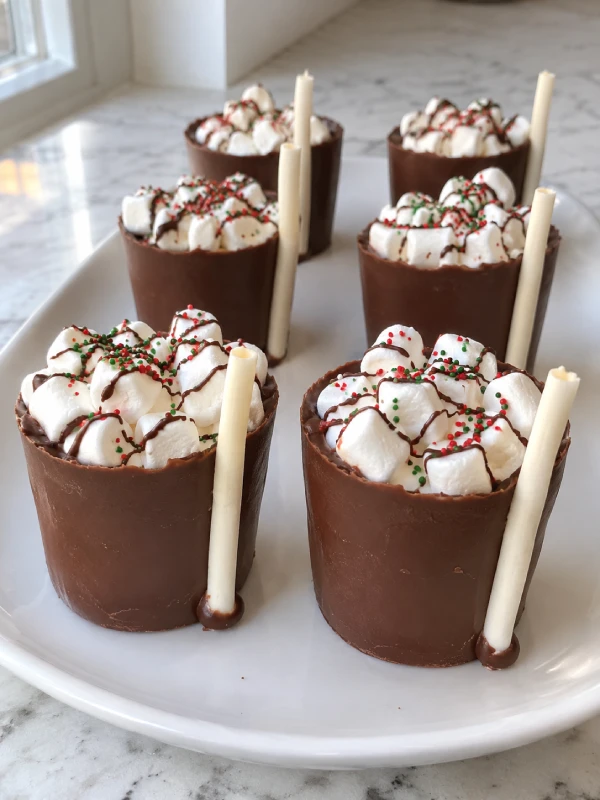
Mini marshmallows peek over chocolate rims, and red and green sprinkles turn Christmas Hot Cocoa Cups into little gifts ready for a cozy evening.
Christmas Hot Cocoa Cups are edible chocolate shells filled with cocoa powder and mini marshmallows, decorated with chocolate drizzle and holiday sprinkles. Coat small molds twice, let the shells harden, then fill and decorate them. Place a finished cup in a heatproof mug and add hot milk to serve.
I’m Olivia White, the home cook behind EATYER. I live in Asheville, North Carolina, where the mountains inspire my down-to-earth kitchen creations. Cooking didn’t come from a family tradition. It started with a burnt pancake and plenty of curiosity. I learned through trial and error, often making mistakes before finding flavors and methods that worked. That’s why I started this blog, to help beginners and home cooks skip some stress and feel comfortable in the kitchen. With these cocoa cups, that means checking the chocolate walls, letting every layer harden, and testing one finished drink before packaging a batch for friends.
What you need to know
Table of Contents
- Yield: Flexible, depending on mold size and chocolate quantity
- Cocoa powder: Approximately 2 tablespoons per chocolate cup
- Chocolate layers: Two, with each allowed to harden fully
- Equipment: Microwave-safe bowl or double boiler, spoon, dry spatula, suitable molds, and a tray
- Serving: Hot milk and sweetener may be needed, depending on your chocolate and cocoa
What Are Christmas Hot Cocoa Cups?
Chocolate shells with a cocoa surprise
Christmas Hot Cocoa Cups hold dry cocoa powder and mini marshmallows inside edible chocolate shells. A little chocolate drizzle secures the marshmallows and gives the sprinkles somewhere to stick. An edible stick attached to the outside adds a festive finishing touch.
Once placed in a mug of hot milk, the chocolate softens and the filling releases. Stir thoroughly to combine everything into a warm drink.
The background on hot chocolate describes drinks made with cocoa powder or chocolate and heated milk or water. These cups combine cocoa powder with a chocolate shell, so the final drink’s richness and sweetness depend on both ingredients.
When to make them for the holidays
Prepare the cups for stocking gifts, a Christmas movie night, or a small gathering around a cocoa station. Package them individually so the decorations stay protected.
For a dessert table, serve prepared mugs of cocoa alongside Vintage Christmas Cake Dip Cups. Guests can enjoy a warm drink with a chilled dessert.
If dinner includes chicken broccoli rice casserole, finish the chocolate cups earlier in the day. They can sit safely packed in a cool, dry place while you prepare dinner.
Ingredients for Christmas Hot Cocoa Cups
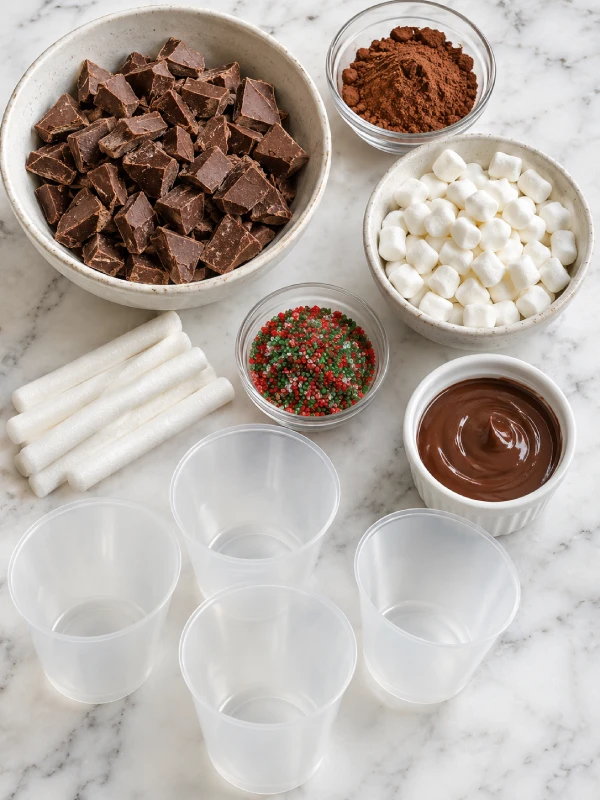
You’ll need chocolate for the shells and decorations, approximately two tablespoons of cocoa powder per cup, mini marshmallows, edible sticks, and Christmas sugar sprinkles. The supplied recipe leaves the chocolate quantity and mold size flexible. Make one trial shell to judge thickness, capacity, and the finished drink’s flavor.
Chocolate shells and cocoa filling
For the chocolate cups
- Meltable chocolate, as needed
- Small food-safe single-use cups, for molding
- Sugar sticks or sturdy edible stir sticks
For the filling
- Cocoa powder, approximately 2 tablespoons per chocolate cup
- Mini marshmallows, as needed
Choose molds specifically suitable for contact with warm melted chocolate and easy to peel away. Check their heat limits before use.
Chocolate products vary. If using couverture or another chocolate intended for molding, follow its tempering directions for a firm, glossy shell. Confectionery coating should be melted and set according to its package instructions.
The recipe specifies cocoa powder. Unsweetened cocoa contributes chocolate flavor without adding sugar, so the shell and marshmallows provide much of the sweetness.
Chocolate drizzle and festive sprinkles
For decorating
- Extra melted chocolate
- Colorful Christmas sugar sprinkles
Gather the decorations before filling the shells. A small piping bag gives you control over the drizzle, though a teaspoon also works.
Use decorations intended to be eaten. If you add shimmer or glitter, check for an edible label and ingredient list, following the FDA’s guidance on decorative food products.
Keep your bowls and utensils dry. Water droplets can cause melted chocolate to thicken or seize, making smooth coating more difficult.
How to Make Christmas Hot Cocoa Cups
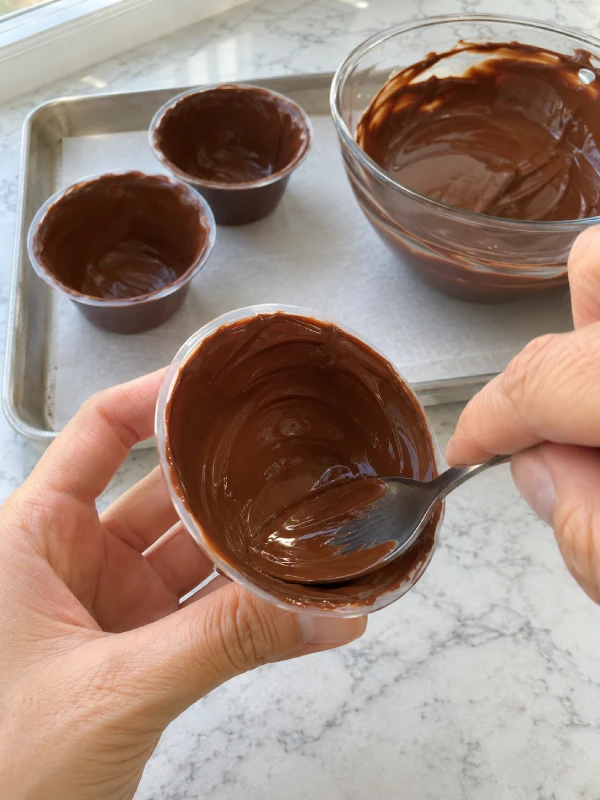
Melt the chocolate gently and coat the bottoms and sides of suitable molds. Let the first coat harden, add a second coat, and unmold only when firm. Attach the edible sticks, add cocoa powder and marshmallows, then finish with chocolate drizzle and sprinkles.
Mold the chocolate shells
- Melt the chocolate. Place it in a microwave-safe bowl and heat in short intervals at low power, stirring between intervals. Alternatively, melt gently over a double boiler. Follow any tempering instructions required for your chocolate.
- Coat the molds. Spoon melted chocolate into each molding cup. Slowly rotate and tilt it to cover the bottom and sides evenly.
- Set the first layer. Allow the coating to harden completely before adding more chocolate.
- Add the second layer. Repeat the coating process, paying attention to the bottom, rim, and any thin patches. Let the second coat harden fully.
- Remove the molds. Carefully peel the single-use molds away from the chocolate shells. Support each shell as you work and check that no mold fragments remain.
- Attach the edible sticks. Use a small amount of melted chocolate to secure a sugar stick or sturdy edible stir stick against the outside near the base. Hold until it begins to set, then leave undisturbed until firm.
Fill and decorate
- Add cocoa powder. Spoon approximately 2 tablespoons into each shell. Choose molds with enough capacity for both cocoa and marshmallows.
- Add marshmallows. Fill the remaining space with mini marshmallows.
- Secure the topping. Drizzle a little melted chocolate over the marshmallows to help hold them in place.
- Decorate. Add more chocolate drizzle to the shells and sprinkle with Christmas sugar decorations while the drizzle is soft.
- Let everything set. Leave the cups until the chocolate drizzle and stick attachments are completely firm.
- Serve or package. Arrange on a platter or place individually in food-safe bags or gift boxes with preparation instructions.
How to Make Strong Chocolate Shells
Check the walls before unmolding
The second coat helps reinforce the shell, especially around the rim and bottom. Inspect the inside after the first layer sets. Add chocolate wherever the wall looks noticeably thin or uneven.
Choose a simple mold shape for your first batch. A slightly tapered cup is easier to peel away than a shape with deep ridges or a narrow opening.
Work with one trial cup before coating every mold. This helps you judge how much chocolate each shell needs and whether the mold releases cleanly.
Support the cup from underneath
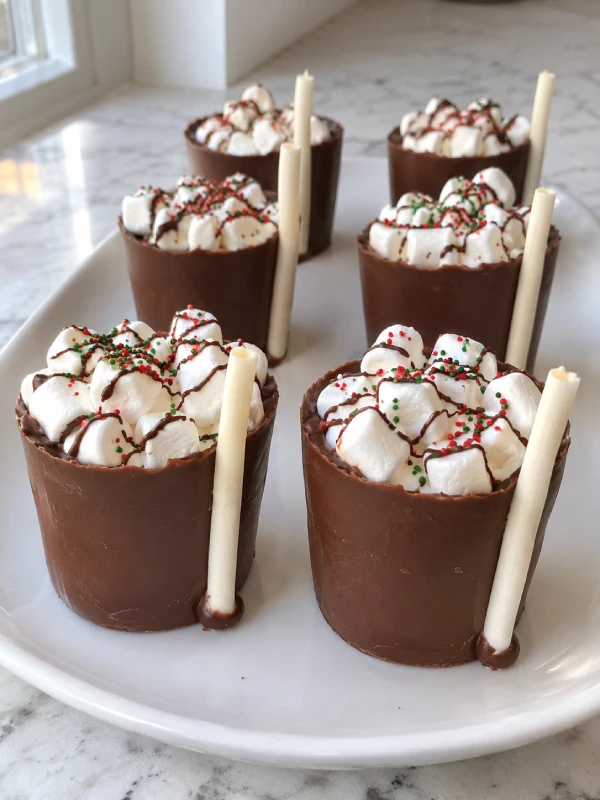

Christmas Hot Cocoa Cups
Ingredients
Equipment
Method
- Melt the chocolate. Place the chocolate in a microwave-safe bowl and heat in short intervals at low power, stirring between intervals. Alternatively, melt gently over a double boiler. Follow any tempering instructions required for your chosen chocolate.
- Coat the molds. Spoon melted chocolate into each food-safe molding cup. Slowly rotate and tilt the mold to cover the bottom and sides evenly.
- Set the first layer. Allow the first chocolate coating to harden completely before adding more chocolate.
- Add the second layer. Repeat the chocolate coating process, paying particular attention to the bottom, rim, and any thin patches. Allow the second chocolate layer to harden fully.
- Remove the molds. Carefully peel the single-use molds away from the chocolate shells. Support each shell while removing the mold and check that no mold fragments remain.
- Attach the edible sticks. Use a small amount of melted chocolate to secure a sugar stick or sturdy edible stir stick against the outside of each shell near the base. Hold it in place until the chocolate begins to set, then leave undisturbed until firm.
- Add cocoa powder. Spoon approximately 2 tablespoons of cocoa powder into each chocolate shell. Make sure the shells have enough capacity for both the cocoa powder and mini marshmallows.
- Add marshmallows. Fill the remaining space inside each chocolate cup with mini marshmallows.
- Secure the topping. Drizzle a small amount of melted chocolate over the mini marshmallows to help hold them in place.
- Decorate. Add more melted chocolate drizzle to the chocolate shells. Sprinkle with colorful Christmas sugar decorations while the drizzle is still soft.
- Let everything set. Leave the decorated chocolate cups undisturbed until the chocolate drizzle and edible stick attachments are completely firm.
- Serve or package. Arrange the finished Christmas Hot Cocoa Cups on a serving platter or package them individually in food-safe bags or supportive gift boxes. Include instructions for preparing the hot cocoa with hot milk.
Notes
| What you notice | What to adjust |
|---|---|
| Thin patches in the shell | Reinforce them during the second coating. |
| The rim breaks during removal | Check that the shell is firm and peel the mold away in smaller sections. |
| The stick comes loose | Reattach it with melted chocolate and let the joint harden fully. |
| Sprinkles slide off | Add them while the decorative drizzle is still soft. |
Serving, Storage, and Holiday Gifting
Turn a chocolate cup into a warm drink
Place one finished cup in a heatproof mug large enough to hold it comfortably. Add hot milk gradually and stir until the shell melts and the cocoa powder disperses.
Because the shell size and chocolate quantity are unspecified, test one serving before gifting the batch. An initial 8 ounces of hot milk is a suggested trial amount. Add more milk if the drink is too concentrated, and sweeten to taste if needed.
Serve a prepared mug after chicken cobbler casserole or tater tot casserole for an easy holiday evening.
For Christmas morning, offer cocoa alongside banana overnight oats or overnight oats with yogurt. Prepare the drinks when everyone is ready to sit down.
Package with clear preparation instructions
Store completely set cups in airtight packaging in a cool, dry place away from direct sunlight and heat. Follow the chocolate and marshmallow manufacturers’ storage guidance.
Use a rigid box or supportive insert to protect the shell. These cups have open tops, so keep them upright to prevent loose cocoa powder from escaping.
Once you’ve tested a serving, include a card with your preferred milk amount, stirring instructions, and any sweetener recommendation. Add an ingredient list so recipients can check allergens.
For guests staying over, package cups while preparing strawberry overnight oats or chocolate overnight oats. Keep the gifts in a separate dry area while breakfast chills.
Frequently Asked Questions
Chocolate and filling
How much chocolate do Christmas Hot Cocoa Cups need?
The amount depends on mold size, shell thickness, and batch size. Make one trial cup, measure the chocolate used, then scale up while allowing extra for attachments and decorations.
Can I use sweetened hot cocoa mix?
The supplied recipe uses cocoa powder. Sweetened mix changes the sweetness and may require a different amount per serving, so test it separately before making a batch.
Do I need to temper the chocolate?
Follow the directions for your chosen product. Chocolate intended for molding may need tempering, while confectionery coating has its own melting and setting instructions.
Serving and gifts
Do I pour milk directly into the edible shell?
Place the shell inside a heatproof mug first. The mug holds the drink as the chocolate melts.
Can I lift the cup by its edible stick?
Support the chocolate shell from underneath. The attached stick may loosen or break under the filled cup’s weight.
How many Christmas Hot Cocoa Cups does this make?
The recipe has a flexible yield because chocolate quantity and mold dimensions are unspecified. Use approximately 2 tablespoons cocoa powder for each cup.
Can I package them immediately after decorating?
Wait until the chocolate drizzle and stick attachment are completely firm, then package upright with support.